Posted in Beef

Crawfish-Stuffed Beef Tenderloin Christmas Day

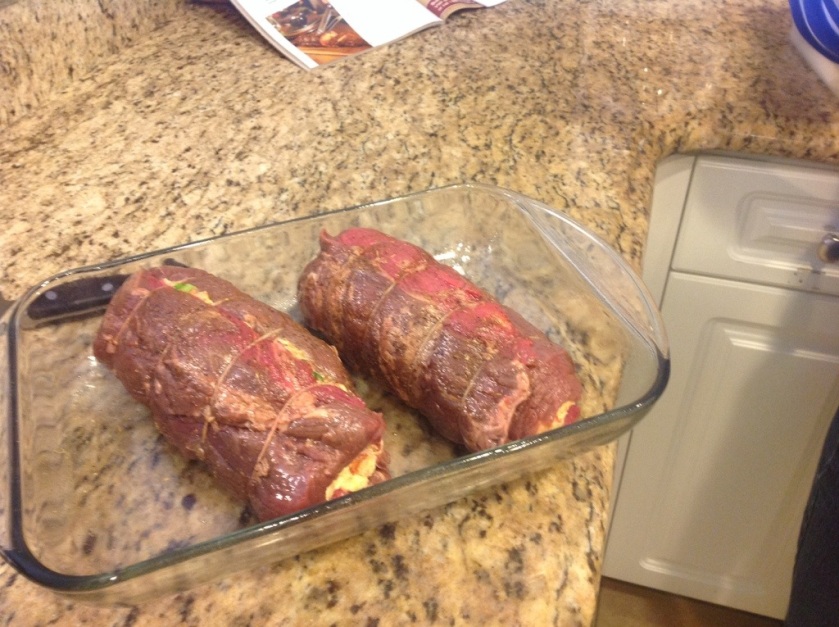
Merry Christmas everyone! Today I made two beef tenderloins filled with crawfish stuffing, an original Deen Brothers recipe. This is a very festive dish for a holiday table. The recipe says that a 6-lb. tenderloin will feed 10 to 12 people, but between the five of us we barely finished one 3-lb. tenderloin. I had two three-pound tenderloins so I divided the recipe for the filling between them.

Crawfish-Stuffed Beef Tenderloin

1 (8-ounce) package cream cheese, softened
1/2 cup shredded Monterey Jack cheese
1/4 cup minced green onions
2 cloves garlic, minced
2 teaspoons Creole or Cajun seasoning, divided
1 teaspoon lemon zest
1 cup panko (Japanese bread crumbs)
1/2 pound frozen cooked crawfish tail meat, thawed
1 (6-pound) beef tenderloin, trimmed
1 tablespoon olive oil
1 teaspoon freshly ground pepper

In a medium bowl, combine cream cheese. Monterey Jack cheese, green onions, garlic, 1 teaspoon Creole seasoning and lemon zest until well blended Add panko and crawfish to the cream cheese mixture, stirring to combine. Stir gently to avoid breaking up the crawfish tails. Preheat the oven to 425 degrees F. Line a roasting pan with aluminum foil. Place a rack over the foil. Spray the rack with nonstick cooking spray. Butterfly the tenderloin by making a lengthwise cut down the center of 1 flat side, cutting to within 1/2 inch of the other side. Be careful not to cut all the way through. Starting from the bottom of the initial cut, slice the tenderloin horizontally to a thickness of 1/2 inch, proceeding with the cut to create a rough rectangle. Repeat the procedure on the right side. Open the tenderloin out and place between 2 sheets of heavy-duty plastic wrap. Using a meat mallet, gently flatten to a 1/2 thickness. Spread the crawfish mixture over the tenderloin, leaving a 1/2-inch border around edges. Starting at a long side, roll up tenderloin, jelly-roll style. Tie tenderloin at 2-inch intervals with kitchen string. Rub with olive oil, and sprinkle with pepper and remaining 1 teaspoon Creole seasoning. Place the stuffed tenderloin, seam side down, on prepared rack. Bake for 35 to 40 minutes or until a meat thermometer inserted into the thickest portion registers 145 degrees F. let stand for 1- minutes before slicing.
We started the meal with a garden salad and sides of traditional Green Bean casserole topped with French’s French Fried onions, cheesy mashed potatoes, and dinner rolls.

20131225-151948.jpg

20131225-152005.jpg

20131225-152029.jpg

Posted in Beef

Cooking in a Condo on Christmas Eve

This year we are celebrating Christmas away from home for the first time ever. We are staying in a condo in Florida and spending the holiday with our son, who is stationed at Eglin Air Force Base. We did not want to eat Christmas Dinner at a restaurant, because it just wouldn’t be right, so we are cooking at the condo. It feels a little strange cooking in an unfamiliar kitchen, but the appliances are good and the kitchen is supplied with decent cookware, dishes and utensils.

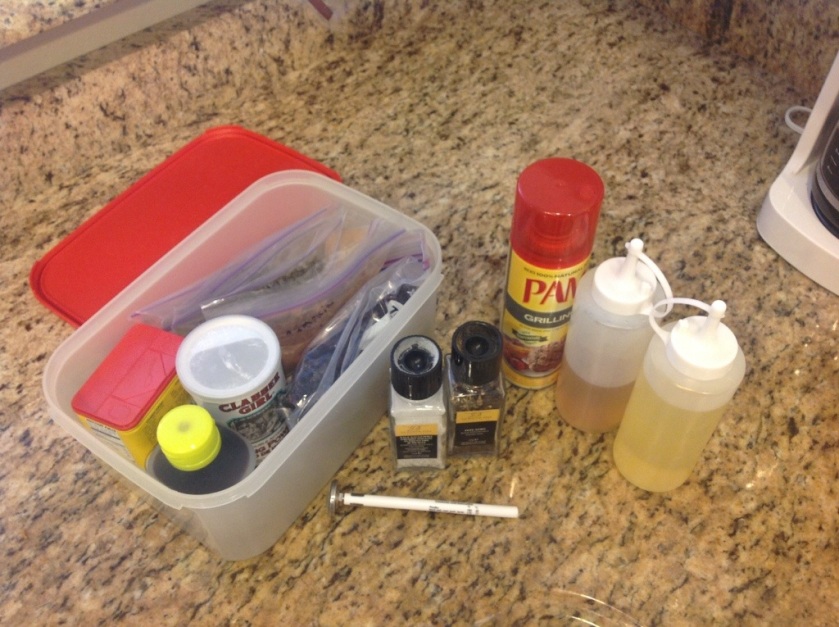
I packed a box of necessities to bring along:

20131224-115808.jpg

20131224-115841.jpg

I used snack-size baggies for baking soda, parsley, pumpkin pie spice, nutmeg, cinnamon, cajun seasoning, ground mustard, oregano and bay leaves. There’s a tin of Old Bay seasoning, some vanilla in a mini-silicone-salad dressing container, squeeze bottles of canola oil and vinegar, a can of Pam spray and a meat thermometer. I planned some meal menus ahead of time that we will definitely have and other items to prepare good, fresh seafood that we can get here on the Emerald Coast. We’ve had Pumpkin Pancakes for breakfast, good old Spaghetti and meatballs and on the stove now is a family favorite, Savory Sweet Pot Roast. It’s was fun to shop at Winn-Dixie and Publix super markets to pick up fresh vegetables and milk. I got the pot roast recipe from the Central Market Cookbook that I bought at Reading Station, Pennsylvania on a vacation years ago. It’s really simple to put together and the sweet gravy is wonderful. The original recipe is only for the roast, but I add vegetables during the last hour of cooking to make a one-pot meal. This is particularly good on cold winter days. I guess you could say it is cold for Florida because the temperature is only in the 50’s.

Savory Sweet Pot Roast

2 to 3 tablespoons canola or vegetable oil
3-4 lb. boneless beef roast – today I’m using a bottom round, but chuck roast also is good
1 medium sweet onion, sliced
1 can cream of mushroom soup
1/2 cup water
3/4 cup brown sugar
1/4 cup white or apple cider vinegar
2 tsp. salt
1 tsp. prepared mustard
1 tsp. Worcestershire sauce
8-ozs. mushrooms of your choice, sliced
1 1/2 to 2 lbs. baby carrots
4-5 potatoes, peeled and diced in 1- to 1 1/2-inch chunks

Slice the onion thinly and aside. Whisk the mushroom soup, water, brown sugar, vinegar, salt, mustard and Worcestershire sauce together until well mixed and set aside. Heat a large dutch oven on the stovetop at medium high heat. When the pot is hot, add the canola oil. Next brown the meat on all sides using a long tongs to turn the meat. Add the sliced onions, tucking them down the sides around the meat and moving the around with the tongs to soften sligthly. Pour the liquid mixture over the meat. Cover and simmer for 1 1/2 to 2 hours. Add the mushrooms, carrots and potatoes, cover and cook for an additional hour or until the vegetables are tender. Serve with dinner rolls for a hearty, comfort-food meal.

Merry Christmas Eve!

20131224-122234.jpg

Posted in Uncategorized

Empanada Day

Having knocked out most the of sweets yesterday, I’m starting on savory foods today. I finished rolling out the extra batch of Empanada dough to chill for filling later and will have over 150 of these little pies this year. In the picture you’ll see what looks like a bunch of dough worms on the side of the pan. Years ago when I started making these, some people had distinct preferences for the Chicken filling as opposed to the Beef. It’s pretty hard to tell by just looking at them which was which, so I started saving some of the dough scraps and shaped little crescents glued to the crust with a little egg wash to mark them as C for Chicken. Some people to this day believe the rumor the C stands for Chris, a friend of my daughter’s since childhood. These are her favorites and she looks forward to having some every year. Believe what you want!

20131210-085217.jpg

Posted in Uncategorized

End of Day 1 – Sweets Nearly Complete

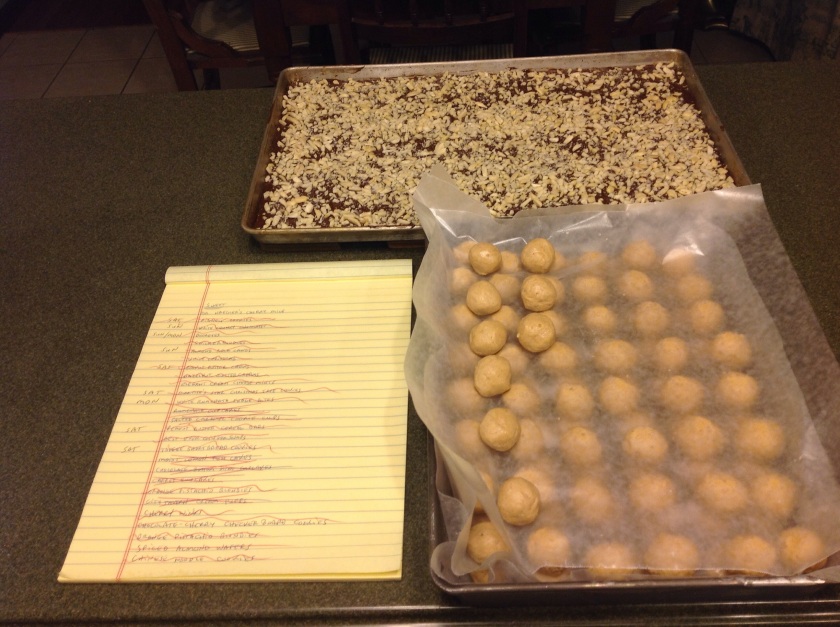
Day 1 of my cooking, baking and candy-making marathon draws to a close. Much was accomplished today and the list of Sweet items has all but one item crossed off. The Cherry Mice will come later this week. I am repeating many of the recipes I traditionally prepare and you can find them in the Archive. Many of the sweet and savory offerings have become favorites and simply can’t be omitted, or I would have a lot of disappointed guests. I try to find a few new things to add some variety, but there are some standards that will always be on the buffet. I baked the Star Christmas Tree Cookies today and made simple small square cut-outs with the remainder of the dough. I rolled Empanada dough and cut dozens of circles that are resting in the refrigerator. My Mom and Dad stopped by to deliver 6 dozen eggs, fresh from the farm, that I’ll use in my cooking this week. My niece, Chelesea, had a day off work and came over to lend a hand. We made White Rumchata Fudge Bites, which was a new candy I tried last year, but it was a big hit and it appears to be the most-frequently-read recipe on this blog. We also made Elegant Cream Cheese Mints, and White Chunky Chocolates with some super-sweet large golden raisins, cashews, peanuts and Craisins. That may not sound like a lot, but we shaped and rolled hundreds of individual pieces of candy. My daughter came over after work to help, too. I had to get a few things from Sam’s so we went out for Chinese food for supper and did our shopping. When we got home Amanda helped Kevin with organizing, decorating and cleaning our basement. While they were downstairs, I made the Almond Roca Candy. It’s cooling on the counter in a buttered jelly roll pan. In the morning I’ll break it up and store it in a tin. Next I made the Hazelnut buttercream candy centers. I tried a new technique, putting the filling into a piping bag and squeezing it into the silicone trays, rather than chilling it first then molding it. We’ll see tomorrow how that turns out. Right now they are setting up in the freezer to be dipped in chocolate for finishing. Last thing tonight I made Buckeye centers. If you like Chocolate and Peanut Butter together this is a recipe you should give a try. Crispy rice cereal, powdered sugar, peanut butter and butter blend into a sweet/salty/crunchy delight. I rolled the balls and put them on waxed paper in layers to conserve freezer space. I will do all of the chocolate-dipped items at the same time. For now,
I crossed the items off the checklist and I’m off to bed for a fresh start tomorrow.

20131209-233933.jpg

Posted in Cookies, Uncategorized

Rolling in the Dough

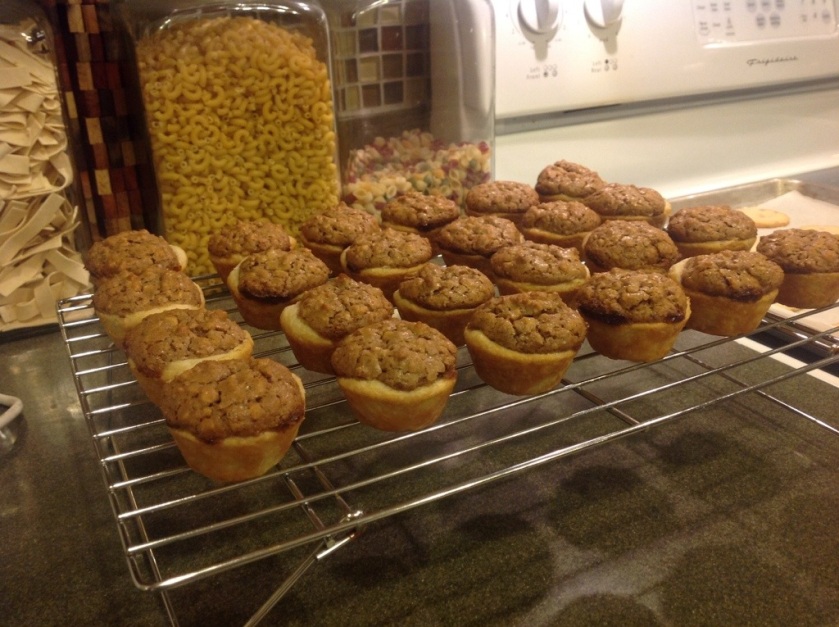
I couldn’t resist the pun, because today I’ve been making dough. Cookie and pastry dough, that is. So far I’ve made cookie dough for a Christmas tree made of stacked star-shaped cookies, Empanada dough for savory mini beef- and chicken-filled pastries (tomorrow’s project) and Pecan Tassies. While waiting for the dough to chill I whipped up a batch of Corn Flake Chews. The recipe for the Pecan Tassies hasn’t been posted on the site yet, so I’ll include it here, but the other recipes are available in the archives.

20131208-153701.jpg

    Pecan Tassies

Tart Shells
1/2 cup butter or margarine, softened
1 package (3 oz.) cream cheese, softened
1 cup all-purpose flour

Filling
2 tablespoons butter or margarine, softened
3/4 cup packed brown sugar
1 egg
1 teaspoon vanilla
1 1/2 cups chopped pecans

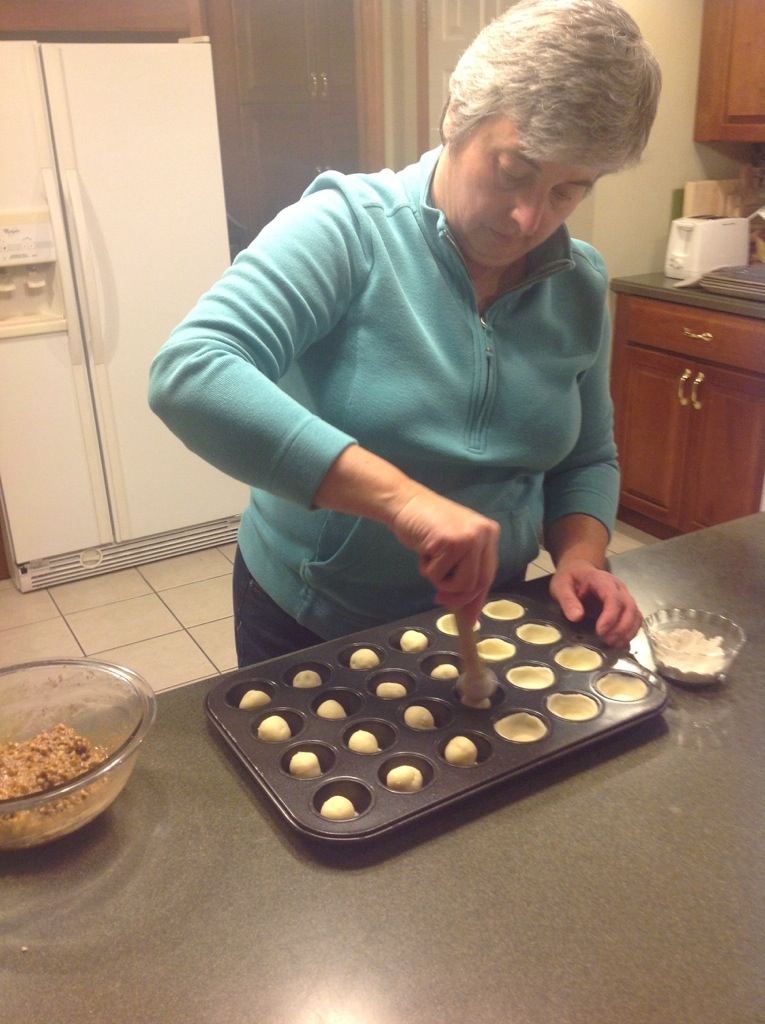
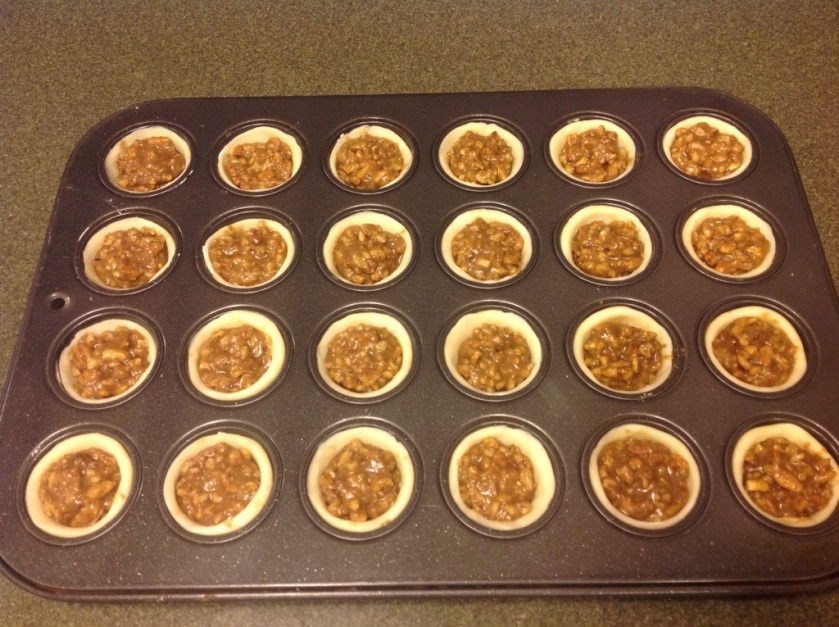
To make the tart shells, beat the butter and cream cheese together until smooth. Add the flour and mix until a soft dough forms. Cover and chill for at least an hour, or overnight. Preheat the oven to 350 degrees F. Shape the dough into 24 balls, each about an inch in diameter. You can use a small cookie scoop to get uniform size. Use an ungreased 24-cup non-stick mini-muffin pan and place one ball in each cup. If you don’t have a no-stick pan, lightly spray a mini-muffin pan with no-stick spray, like Pam. Years ago I bought a wooden tart tamper at a Pampered Chef party and it is perfect for this purpose. Put a little flour in a small bowl and dip the tamper in it, dusting the flat bottom and the entire rounded portion. Use the tamper to evenly press the ball into the pan and shape it against the walls of the cup. Be careful not to press too hard or the bottom of the tart will be too thin an the filling could seep out. Continue dusting the tamper as needed to avoid sticking to the dough. Once the tarts have been shaped, melt the butter in a medium mixing bowl for about 20-30 seconds on high. Put the remaining ingredients in the bowl and mix well. The mixture will be thick and pasty. Fill the tart shells evenly with the mixture. Bake for 20-25 minutes or until light golden brown. If you have a dark no-stick pan, it may not take as long for the tarts to brown. Remove from the pan and cool on a rack. Store in an airtight container. These are very much like mini Pecan Pies and the crust is nice and flaky.
I made Peanut Butter Cereal Bars and rolled, cut out and baked the Toffee Shortbread cookies that have been refrigerated this week.
I may make some Cream Cheese Mints tonight yet, but I’ll probably call it quits soon and start fresh tomorrow. I am off work all week and the cooking, baking, and candy making commences full time with the count down beginning to our annual open house on Friday night.

20131208-214447.jpg

20131208-214504.jpg

20131208-214516.jpg

20131208-214523.jpg

Posted in Appetizers, Beef, Snacks

Summer Sausage Day 4

Today I woke up to the alarm of my oven timer’s beep-beep-beeping. The sausage is done and it looks and smells great. The hamburger was pretty lean because there wasn’t much drippage in the bottom of the pan. It’s ready to eat now, but I’ll let it cool for about an hour, then slice and package it up so that it’s ready to plate for the party.

20131207-064745.jpg

Posted in Appetizers, Snacks

Summer Sausage Day 3

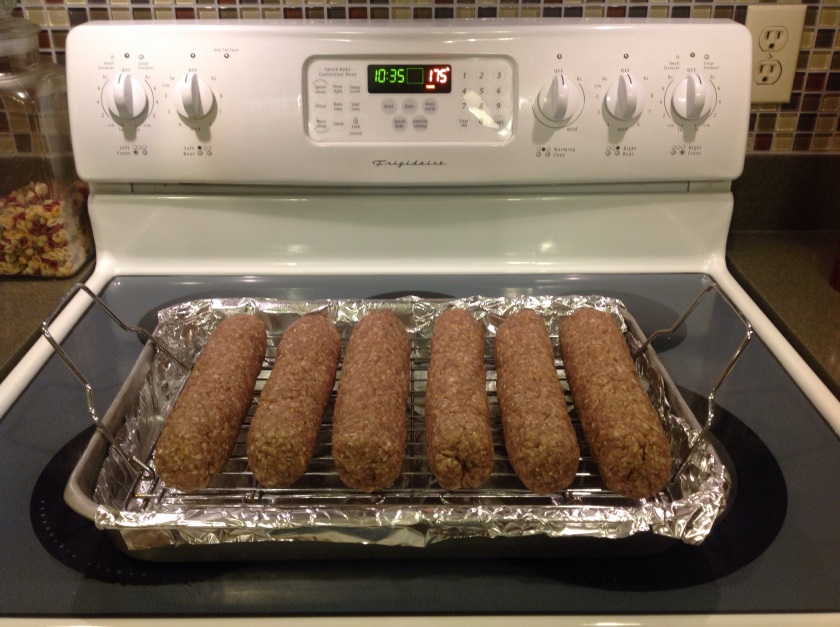
The meat mixture has finished it’s three-day quick cure in the refrigerator. The color and texture are pretty much the same as last night. I set the oven at 175 degrees F and got to work. I pulled out a large baking pan with sides and covered it with aluminum foil.
Next I placed a rack in the pan. I used a rack that came with my electric roaster then remembered that when I used it last year, the logs had deep indentations in them because the wires were fairly far apart and the rolls sagged a bit between them. I found a cookie-cooling rack with more wires spaced closer together and put it on top of the first rack. I suppose I could have taken the bottom rack out, but it’s getting late and it won’t do any harm to just leave it there. I used a light coating of non-stick spray on the racks. When the pan and racks were prepared, I popped the meat out onto my clean kitchen counter and divided it into six fairly equal portions. This is important so that it reaches a safe internal temperature and cooks evenly all the way through. Nobody wants to get E. Coli from undercooked beef. I took each portion and compacted it tightly then rolled them into logs about 8 to 10 inches long. I placed all of the logs on the rack leaving a little space in between so they don’t touch and stick together during baking. Into the oven they went.

20131206-225440.jpg

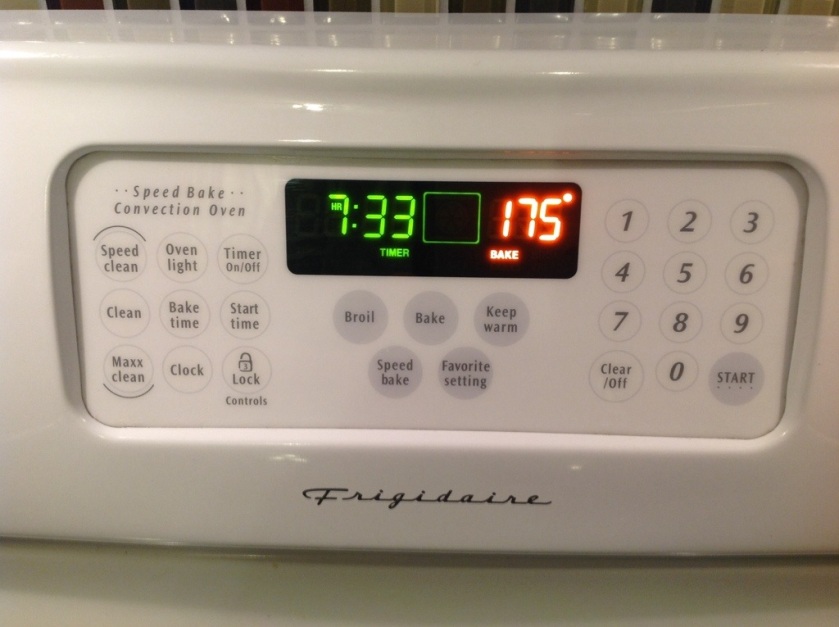
The timer is set for 8 hours and there’s nothing more to do now but scrub my kitchen counter down with hot soapy water and go to bed. I wish I had a time-elapsed photo to show you how they’ll turn out, but you’re going to have to check back in tomorrow to get that picture. See you in 7 hours and 33 minutes!

20131206-230353.jpg

Posted in Uncategorized

Summer Sausage Day 2

I almost forgot to mix the Summer Sausage tonight!

When I pulled the lid off the hickory scent wafted up. Strangely enough, it even smells good raw. The quick cure salt has begun to do its work. The color has turned from bright pink to a light brown. I kneaded that cold, cold, mountain of meat and sealed it back up for another night in the fridge. Tomorrow night it gets shaped into logs and baked low and slow.

20131205-231049.jpg

Posted in Cookies, Snacks

Beat the Clock!

Tonight, like millions of people across the country, I want to sit down and watch a rare television event. A LIVE musical show on TV. The Sound of Music is starting now on NBC and I have to bake a batch of cookies and make a snack for a Cookie Exchange we’re going to tomorrow night. I started about 6:00 p.m. after we’d eaten supper. First my husband found a quick Chex Mix recipe on the internet:

Cheesy Ranch Chex Mix

I didn’t have any “square cheese crackers” in my pantry so I used some Cheddar Corn Sticks. They should do nicely. I mixed it together and Kevin took over the microwave-stir-microwave rotation while I started on the cookies while he spread the Chex Mix out on a wax paper-lined baking sheet to cool.

20131205-190401.jpg

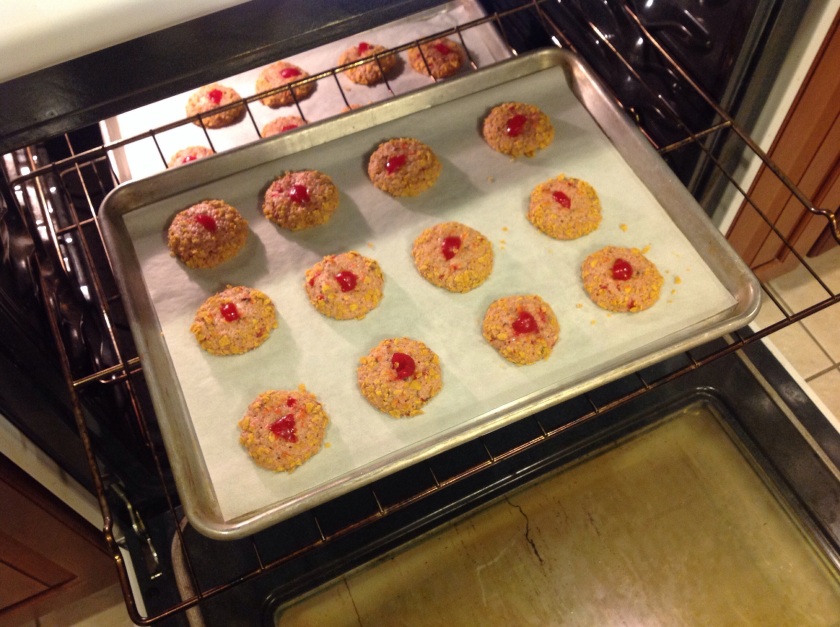
I pulled an old favorite recipe for Cherry Winks and put the batter together. This recipe is available in the archives from last December. I almost beat the clock, but it takes a while to roll 5 or 6 dozen balls, coat them in cornflake crumbs, then top them with a winking maraschino cherry. The last batch is down to 7 minutes 47 seconds so I haven’t missed much. Enjoy the show everybody!.

20131205-190637.jpg

Posted in Beef

80-Hour Recipe

Tonight I got home from work about 5:00 and we went out to grab a bite to eat and pick up a few groceries. It was after 7:00 when I started in the kitchen. I began a three-day process to make home-made Summer Sausage. The recipe takes about 80 hours from start to finish, but don’t let that intimidate you. Most of that time the mixture is resting in the refrigerator or baking in the oven. I think the hardest thing about this recipe is sticking your hands in icy cold hamburger to mix it thoroughly, but I’m getting ahead of myself. Here are the ingredients:

Summer Sausage

5 lbs. lean hamburger (try to find 80% Lean /20% Fat ground beef)
5 rounded teaspoons of Morton’s Tender Quick Curing Salt
2 – 3 teaspoons mustard seed
2 1/2 teaspoons coarse ground pepper
2 1/2 teaspoons garlic salt (I like Lawry’s coarse ground with parsley)
1 tablespoon Liquid Smoke – I used Wright’s Hickory flavored Liquid Smoke – Mesquite flavor is also very good

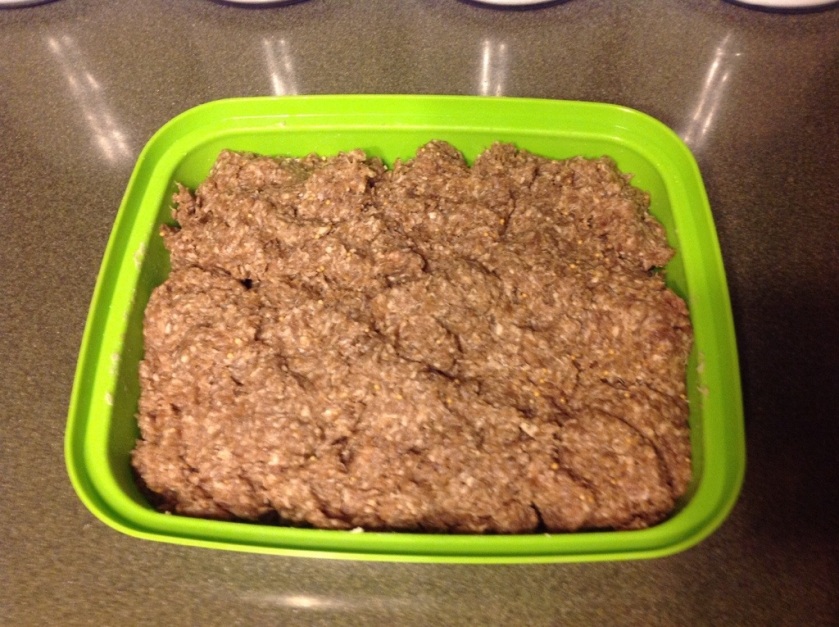
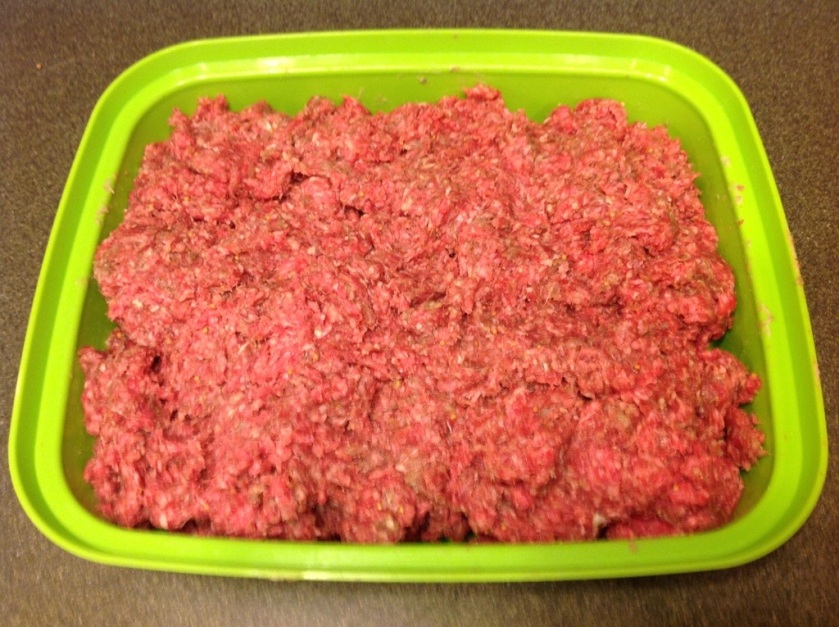
In a large plastic sealable bowl, mix the hamburger with all ingredients. Wash your hands and get in there and really mash it around, making sure all of the ingredients are evenly distributed. When you think you’ve mixed it enough, mix it a little more. It’s cold and not the most pleasant sensation, but in the end it’s well worth it. If you’ve ever had a hot wax treatment on your feet or hands, that’s the best way I can describe the feeling, only the waxy coating is cold and doesn’t peel off quite so easily. Wash your hands thoroughly with hot soapy water, then seal the container up and refrigerate it, covered, for 24 hours, or at least overnight. Take it out of the refrigerator once a day and mix again using the same technique, returning it to the refrigerator to rest. Do this a total of three times, including the first mixing. I like to do it in the evening because on the last night, it will go into the oven for 8 hours. While I’m sleeping seems like the best time to do this. After the third round of mixing, prepare for baking. Preheat the oven to 175 degrees F. Line a large rimmed baking sheet with aluminum foil and position a baking rack on the foil. Shape the mixture into rolls 8 to 12 inches long. You should end up with 5 to 8 rolls depending on how large in diameter you choose to make them. Compress and roll them tightly to avoid air spaces that make the sausage holey when you slice it. I make them a little larger in diameter than a Ritz cracker because they will shrink a bit during baking. I’ve seen several different versions of this recipe and this one is a blend of a couple of them. The original recipe instructed you to turn the rolls over after 5 to 6 hours, but I roundly ignored that and stayed in bed. The Sausage did not suffer the worse for it and cooked through and through. Set a timer and bake for 8 hours. It’s quite an appealing aroma to wake up to. Remove the pan from the oven and allow the sausages to cool. It is ready to eat. Refrigerate or freeze it when cooled. It tolerates freezing for a couple of months. To make this party-ready to serve, I slice it into 1/8″-thick portions then reassemble it into a log and wrap it tightly with Glad Press and Seal wrap and store in the refrigerator. At serving time, pull it out, unwrap it and fan the slices out on a decorative serving plate, cutting board, or marble pastry board along with assorted cheeses. I can taste it already!

20131204-224525.jpg

20131204-224536.jpg